Safety Precautions and Important Instructions
Always read the manual before using your Kenmore gas stove. If you smell gas, do not operate appliances or phones; evacuate and contact your gas supplier immediately. Ensure installation is done by a qualified professional to avoid hazards.

Never attempt to repair or convert gas components without proper guidance. Keep flammable materials away from the stove and oven. Follow all safety symbols and instructions provided in this manual carefully.
1.1. Essential Safety Symbols and Their Meanings
The Kenmore gas stove manual uses specific safety symbols to ensure safe operation. A warning symbol (triangle with exclamation mark) indicates potential hazards. A caution symbol (exclamation mark) highlights important safety instructions. The attention symbol (exclamation mark in a circle) signals critical information to avoid accidents. These symbols are placed throughout the manual and on the appliance to draw attention to vital safety measures. Always pay close attention to these symbols and follow the corresponding instructions to prevent injuries or property damage.
1.2. Critical Safety Warnings for Gas Stove Usage
Always follow critical safety warnings to ensure safe operation of your Kenmore gas stove. Never operate the stove near flammable materials or in poorly ventilated areas, as this can lead to fire hazards or carbon monoxide buildup. Do not use the oven or burners as a heating source. If you smell gas, immediately evacuate the area, do not operate electrical devices, and contact your gas supplier or fire department. Ensure the stove is installed and serviced by a qualified technician. Never attempt to modify or repair gas components without proper guidance. Failure to adhere to these warnings can result in serious injury, property damage, or fatal accidents.
Locating the Model and Serial Number
The model and serial number are located on the identification plate, found under the lift-up cooktop or on the right side of the front frame in the storage drawer compartment. These numbers are essential for accessing your Kenmore gas stove manual online.
2.1. Where to Find the Identification Plate on Your Kenmore Gas Stove
The identification plate containing the model and serial number is located in two possible spots on your Kenmore gas stove. For gas models, it can be found under the lift-up cooktop cover, which you can access by gently lifting the cooktop surface. Alternatively, it may be positioned on the right side of the front frame, within the storage drawer compartment. Ensure the stove is cool before attempting to locate the plate, and refer to your manual for precise instructions. These numbers are crucial for accessing specific guides, troubleshooting, and warranty services. Always record them for future reference.
2.2. How to Search for Your Kenmore Manual Online
To find your Kenmore gas stove manual online, start by locating your model and serial number on the identification plate. Visit the official Kenmore website or platforms like ManualsLib, which host a wide range of Kenmore manuals. Use the search bar on these sites, entering your specific model number, such as “Kenmore 790.74233312,” to retrieve the manual. Many manuals are available in PDF format for easy download or viewing. If the official Kenmore site doesn’t have your model, try alternative resources or search engines using keywords like “Kenmore gas stove manual” along with your model number. Always ensure you’re downloading from a trusted source to avoid incorrect or unsafe information.
Installation and Setup Guidelines
Ensure proper ventilation and follow installation instructions carefully. Install the gas stove on a level surface, secure it, and connect gas lines correctly. Hire a qualified technician for safe setup.
Ensure the gas supply connection is installed by a qualified technician. Use a regulator approved for your stove’s gas type (natural or propane). The gas line must be properly sized and securely connected to avoid leaks. Install a gas shut-off valve near the stove for emergency situations. Verify that all connections are tight and leak-tested before use. Follow local plumbing codes and manufacturer specifications. Never attempt to modify or adapt the gas supply system yourself. Proper installation ensures safe and efficient operation of your Kenmore gas stove.
3.2. Step-by-Step Installation Instructions for the Kenmore Gas Stove
3.1. Gas Supply Connection Requirements
Ensure the gas supply connection is installed by a qualified technician. Use a regulator approved for your stove’s gas type (natural or propane). The gas line must be properly sized and securely connected to avoid leaks. Install a gas shut-off valve near the stove for emergency situations. Verify that all connections are tight and leak-tested before use. Follow local plumbing codes and manufacturer specifications. Never attempt to modify or adapt the gas supply system yourself. Proper installation ensures safe and efficient operation of your Kenmore gas stove.
Operating the Kenmore Gas Stove
Operate the cooktop by turning the burner knobs counterclockwise to ignite. Use the oven controls to set temperature and timer. Always use proper cookware and ensure the area is clear of flammable materials. Refer to the manual for specific instructions on electronic oven controls and kitchen timer features.
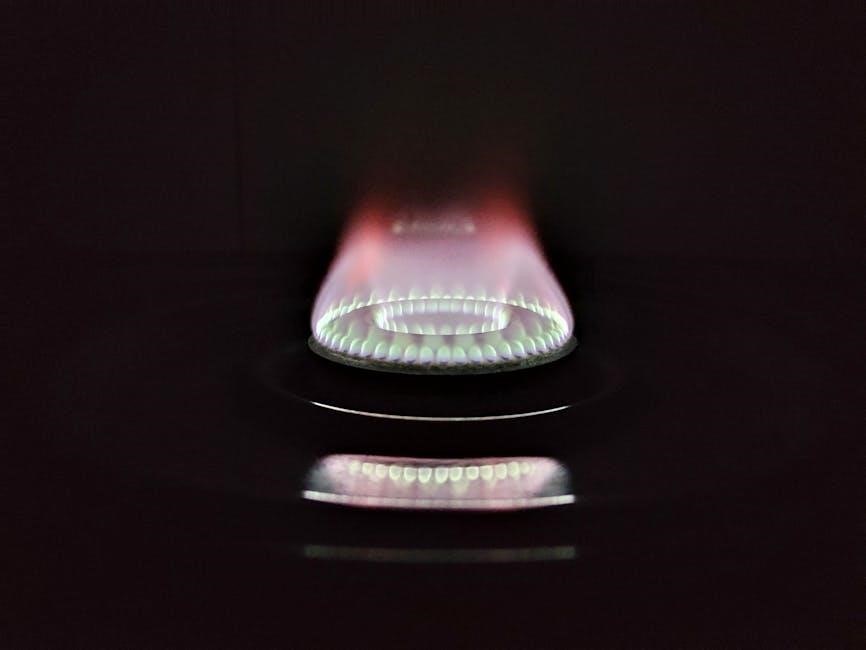
4.1. How to Use the Cooktop Burners Safely and Effectively
To use the cooktop burners safely, ensure the area is clear of flammable materials. Always turn the burner knob counterclockwise to ignite, using the correct cookware size. Avoid leaving cooking unattended. For optimal performance, keep the burner caps clean and properly aligned. If using LP gas, ensure the pressure regulator is correctly set. Never operate burners near open flames or sparks. Regularly inspect burner ports for blockages and clean them as needed. Use the simmer burner for low-heat cooking to conserve energy. Always follow the manufacturer’s guidelines for burner maintenance and operation to ensure safety and efficiency.
4.2. Understanding and Adjusting Oven Controls
Your Kenmore gas stove features an electronic oven control panel for precise temperature management. To operate, select the desired cooking mode (e.g., bake, broil) using the control knob or touchscreen. Set the temperature by pressing the number pad or turning the knob, then confirm with “Start.” Use the kitchen timer to monitor cooking time. Always preheat the oven before placing food inside. Adjust settings as needed for even cooking. Ensure racks are correctly positioned for optimal airflow. Regularly clean the control panel to maintain functionality. Refer to the manual for specific guidance on advanced features like convection cooking or Sabbath mode.
Maintenance and Troubleshooting
Regularly clean the stovetop, burners, and oven to maintain performance. Check burner flames for proper ignition and ensure the igniter is functioning. Refer to the manual for troubleshooting common issues like uneven heating or burner malfunction. Address problems promptly to avoid further damage. Contact Kenmore customer support for professional assistance if needed.
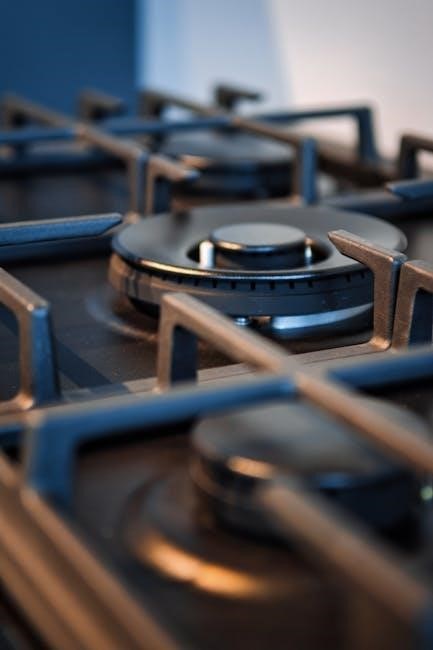
5.1. Cleaning the Stovetop, Burners, and Oven
Regular cleaning is essential to maintain your Kenmore gas stove’s performance and safety. For the stovetop and burners, use a mild detergent and warm water, avoiding abrasive materials that may scratch surfaces. Soak burner caps and grates in hot soapy water to remove grease and food residue. The oven should be cleaned periodically using a damp cloth for daily spills and a mixture of water and baking soda for tougher grime. Allow the paste to sit overnight before wiping clean. Always unplug the stove before deep cleaning and ensure all surfaces are dry to prevent rust or damage. Refer to your manual for model-specific cleaning instructions.
5.2. Common Issues and How to Resolve Them
Common issues with your Kenmore gas stove include burners not lighting, uneven heating, or the oven not reaching the correct temperature. For burners, clean the burner ports and ensure the gas supply is turned on. If the igniter glows but the burner doesn’t light, check for blockages or loose connections. For oven temperature issues, recalibrate the oven using the controls as described in the manual. If problems persist, ensure proper installation and ventilation. Always refer to your manual for specific troubleshooting steps. If issues cannot be resolved, contact Kenmore customer support or a certified technician for professional assistance.
Warranty and Customer Support
Your Kenmore gas stove is backed by a warranty covering components like cooktop burners and oven glass. Visit the Kenmore website to download manuals and contact support for assistance with repairs or parts.
6.1. Warranty Coverage for Kenmore Gas Stove Components
Kenmore gas stoves come with a comprehensive warranty covering essential components. Burners, oven glass, and electric elements are warranted against defects for as long as you own the appliance. During the first year, defective parts are replaced free of charge. After the initial year, replacements are provided at no cost, ensuring long-term durability and performance. The warranty does not cover damage caused by misuse or improper installation. For detailed warranty terms, refer to the owner’s manual or visit the Kenmore website. This coverage underscores Kenmore’s commitment to quality and customer satisfaction.
6.2. Contacting Kenmore Customer Service for Assistance
Kenmore provides dedicated customer support to address your questions and concerns. Visit the official Kenmore website to access the “Contact Us” section, where you can find phone numbers, email options, and live chat services. For faster assistance, have your appliance’s model and serial number ready. Additionally, you can download manuals, check warranty status, or schedule service appointments online. Kenmore’s customer service team is available to help with troubleshooting, repair requests, and general inquiries. Ensure to reach out through official channels to receive genuine support and maintain your appliance’s performance.